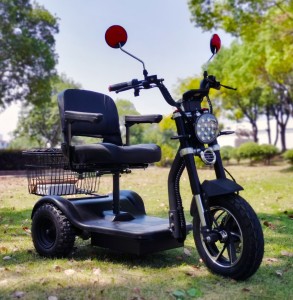
One of the important components of an electric scooter is the battery, as it powers the vehicle and determines its overall performance. As an electric scooter user, it’s critical to know how to test your scooter battery to ensure it’s in top condition and giving you a reliable, safe ride every time. In this blog post, we’ll explore the importance of testing electric scooter batteries and the step-by-step process for doing a thorough check.
Learn about the importance of testing your scooter battery:
Testing electric scooter batteries is critical for a number of reasons. First, it helps determine the overall health and lifespan of your battery. Batteries naturally degrade over time and their capacity may decrease, resulting in reduced performance and reduced runtime. By regularly testing your scooter’s battery, you can keep track of its condition and plan for replacement if necessary.
Second, testing the battery allows you to spot any potential problems or malfunctions. If the battery fails, it may not be able to charge, limiting the usability of the scooter. Through testing, you can detect problems early and fix them to prevent any inconvenience or unexpected failure.
Step-by-step procedure for testing a mobility scooter battery:
1. Safety first: Before starting the testing process, please make sure the electric scooter is turned off and disconnected from the power source. This step is critical to avoid any electrical accidents during the test.
2. Have the necessary tools ready: You will need a voltmeter or multimeter to accurately test your scooter battery. Make sure your tools are properly calibrated and functioning properly.
3. Access to the battery: Most mobility scooter batteries are located under the seat or in a compartment on the rear of the scooter. Consult your scooter’s owner’s manual if you are unsure of the location.
4. Battery Voltage Test: Set the voltmeter to the DC voltage setting and place the positive (red) probe on the positive terminal of the battery and the negative (black) probe on the negative terminal. Read the voltage displayed on the meter. A fully charged 12 volt battery should read above 12.6 volts. Any significantly lower value may indicate a problem.
5. Load test: The load test determines the battery’s ability to hold a charge under a specific load. If you have access to a load tester, follow the manufacturer’s instructions for connecting it to the battery. Apply the load for the specified time and check the result. Compare the readings to the load tester’s guide to determine if the battery is functioning properly.
6. Charge Test: If your mobility scooter battery is flat, it may indicate that it needs to be charged. Connect it to a compatible charger and charge according to the manufacturer’s instructions. Monitor the charging process to ensure it completes successfully. If the battery won’t charge, it could indicate a deeper problem.
Testing electric scooter batteries is an important maintenance task to ensure optimal performance and longevity. By following the step-by-step process outlined in this guide, you can effectively assess the health of your battery, identify potential failures, and take appropriate action. Remember, testing your mobility scooter battery regularly can improve safety and ensure an uninterrupted and enjoyable riding experience.
Post time: Aug-28-2023


